Exhibition Booth Design Mistakes That Can Cost You Visitors
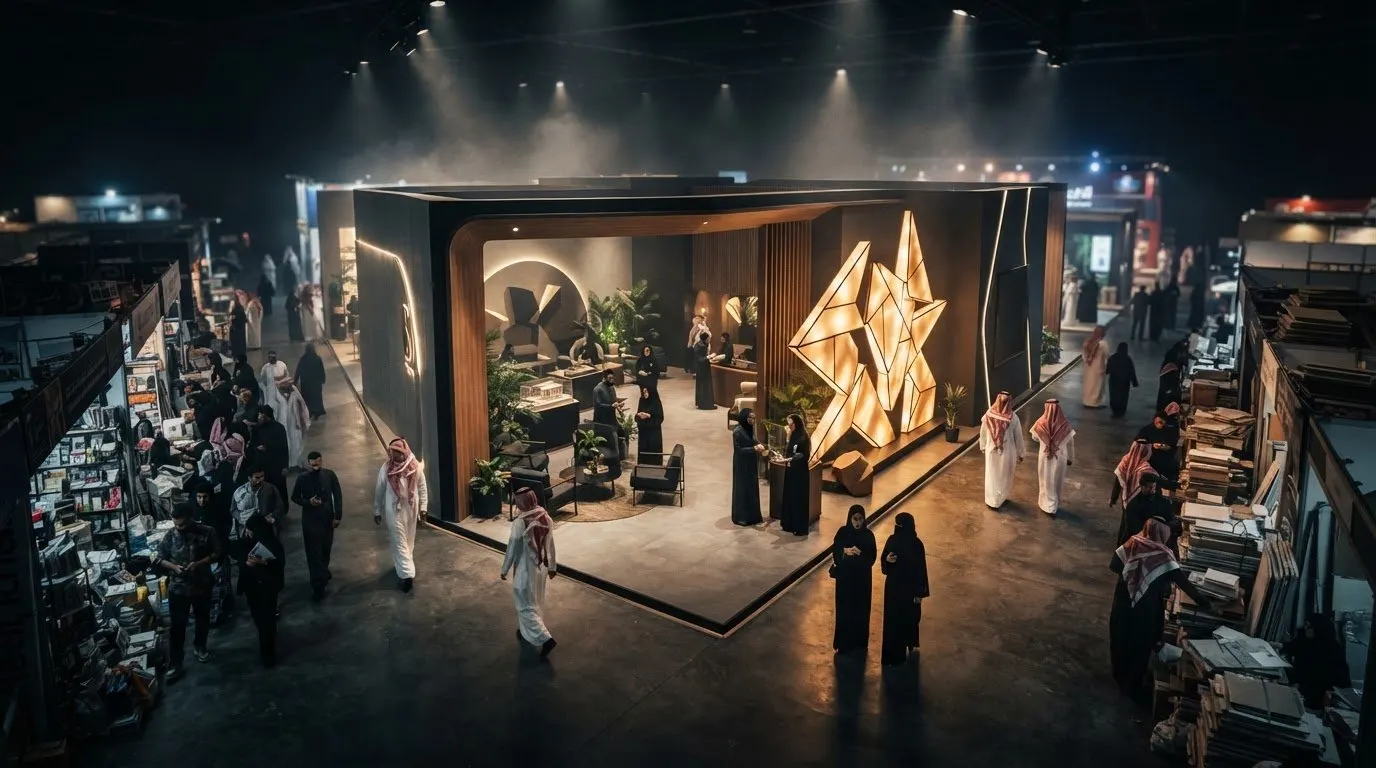
A polished booth can still lose visitors if they can’t tell what you offer or how to enter. Common exhibition booth design mistakes include weak planning, unclear messaging, little reason to engage, vague goals, and layouts that restrict movement. Fix these before production, not after the stand is built.
It’s easy to focus first on colours, screens, and finishes. But a booth has to work on the exhibition floor: attract the right people, communicate your message quickly, and give visitors room to move and talk.
This guide explains how to avoid mistakes at every stage, from writing a clear brief and choosing one main message to preparing staff and planning visitor flow. You’ll learn what to plan, what to simplify, and how to align the booth with your exhibition goals in Saudi Arabia.
Key Takeaways
- Build the brief around your audience, goals, practical needs, and venue requirements before design work begins.
- Give visitors one clear message they can grasp quickly, then use visuals to support it rather than compete with it.
- Train booth staff to listen first, answer clearly, and guide interested visitors toward a useful next step.
- Set measurable exhibition goals and agree on how the team will capture and follow up with leads.
- Map open pathways and purposeful zones so visitors can enter, explore, and talk without crowding or confusion.
1. Planning booth design and fabrication in advance
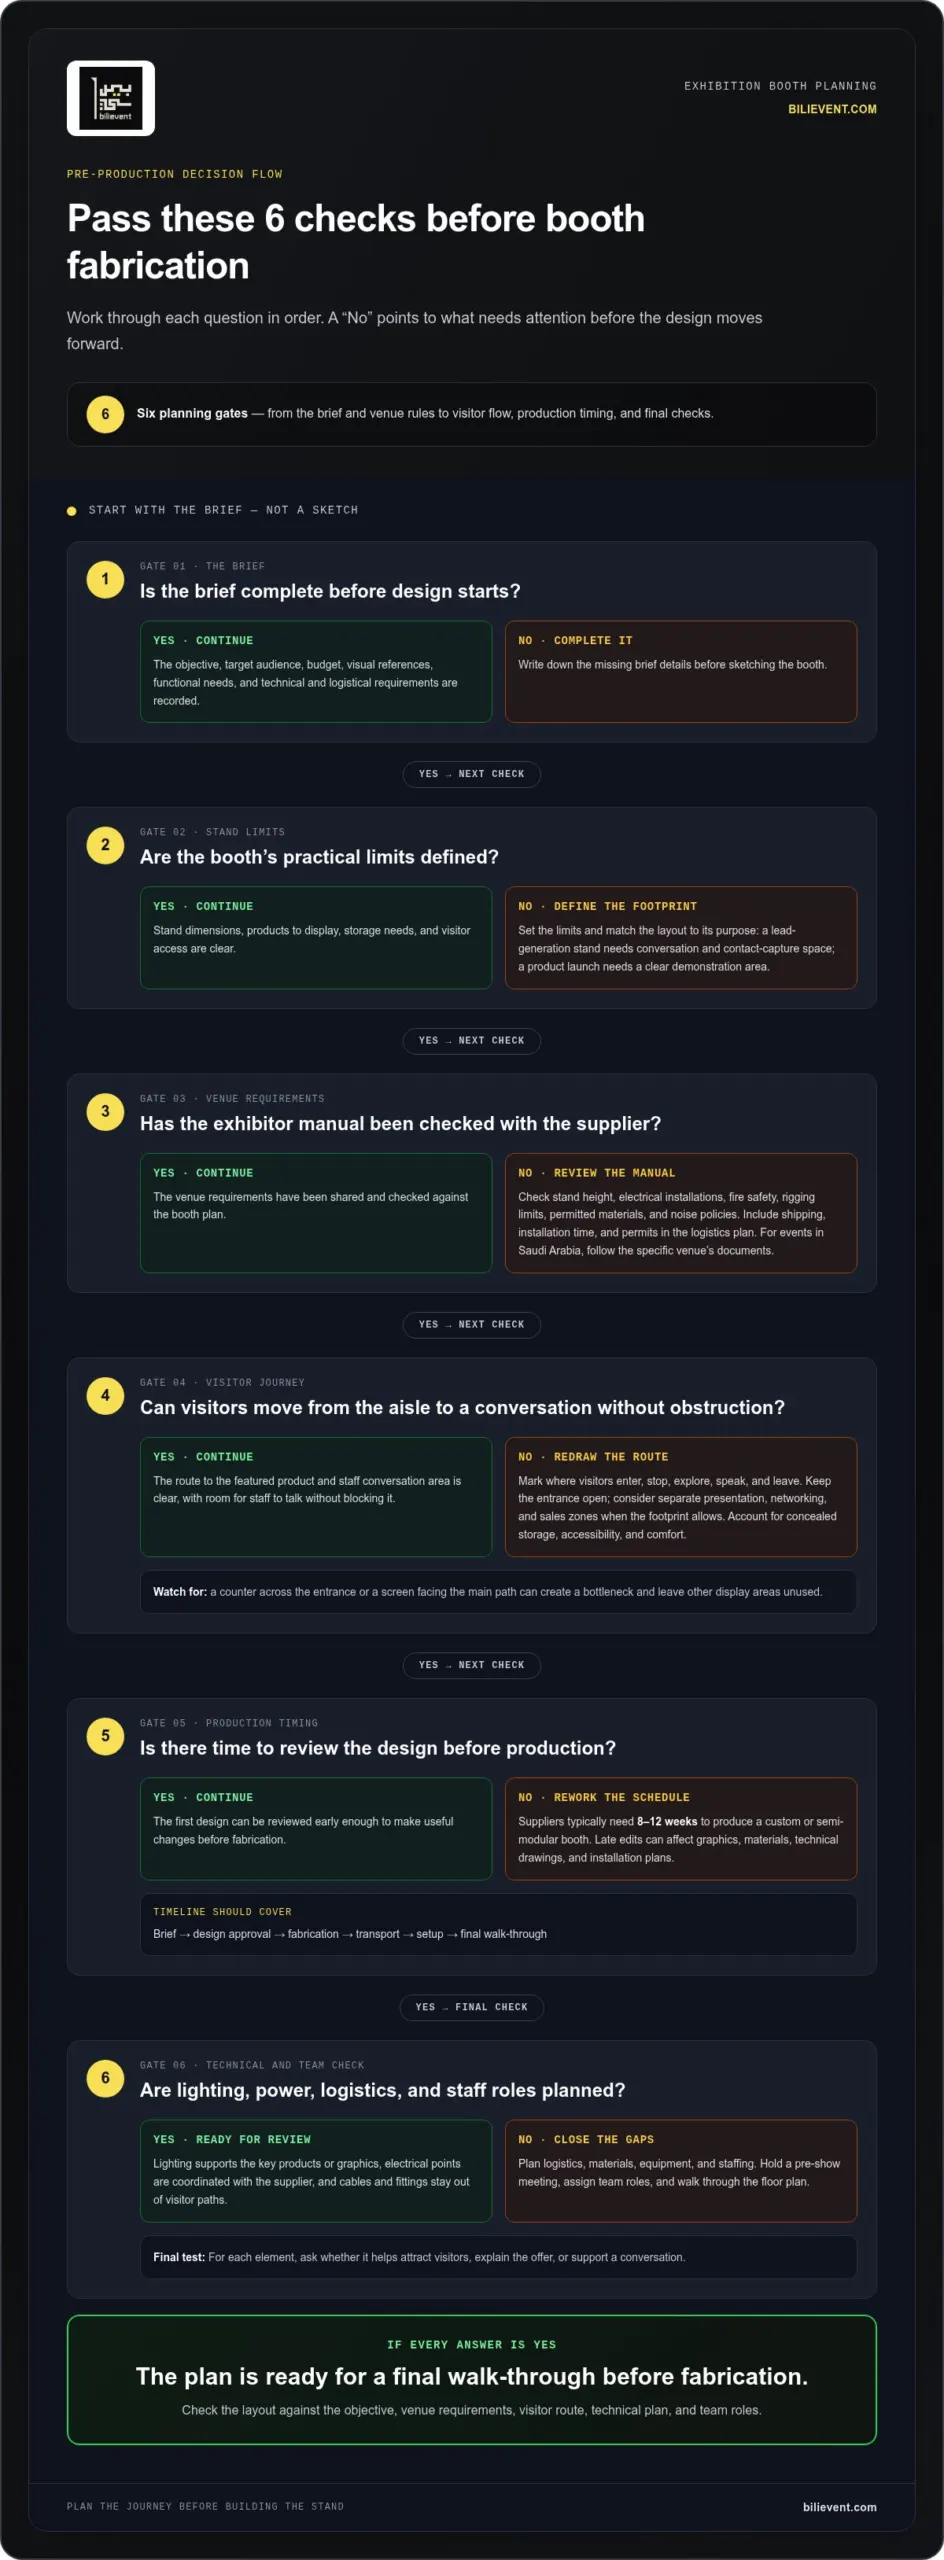
Start with a brief, not a sketch. Record the exhibition objective, target audience, budget, visual references, functional needs, and technical and logistical requirements. Then define the limits: stand dimensions, products to display, storage needs, and visitor access. A lead-generation stand, for example, needs space for conversations and contact capture, while a product launch needs a clear demonstration area. Give every booth element a purpose.
Plan after choosing the exhibition, then leave time for review. Suppliers typically need 8-12 weeks to produce a custom or semi-modular exhibition booth. Share the first design early enough to make useful changes before production. Late edits can affect graphics, materials, technical drawings, and installation plans. A simple timeline should cover the brief, design approval, fabrication, transport, setup, and a final walk-through.
Get the venue’s exhibitor manual early and share it with your booth supplier. Check the stand height, electrical installations, fire-safety requirements, rigging limits, permitted materials, and noise policies against the manual. These details shape the design as well as the setup. Include shipping, installation time, and permits in the logistics plan. For an exhibition in Saudi Arabia, follow the specific venue’s documents rather than assuming every event has the same requirements.
Plan the visitor journey on the floor plan. Mark the entrance, then show where visitors will stop, explore, speak with staff, and leave. Separate presentation, networking, and sales zones when the footprint allows. Position reception desks and private seating near the edges or rear of an open-front stand. This keeps the entrance clear and gives visitors a direct route to the main display.
Use the plan to test movement before fabrication. Trace a visitor’s route from the aisle to a featured product and then to a staff conversation area. Make room for staff to speak without blocking that route. Include concealed storage for bags and materials, and account for accessibility and comfort. A counter across the entrance or a screen facing the main path can create a bottleneck and leave other display areas unused.
Plan lighting and power alongside the structure. Identify the products or graphics that need spotlights, then position accent lighting to support the layout. Coordinate electrical points with your booth supplier before production so cables and fittings don’t cross visitor paths. Poorly placed lighting can hide a key feature, while overly bright colours can distract from it. Treat lighting as part of the visitor journey, not a last-minute decoration.
Finish with a practical checklist covering logistics, materials, equipment, and staffing. Hold a pre-show meeting to assign team roles and walk through the floor plan. Review each element against the objective: does it help attract visitors, explain the offer, or support a conversation? This check protects the investment and catches design gaps before fabrication begins.
2. Communicating the brand message clearly
Visitors should understand what your business offers within three seconds. Use one headline and one explanatory line to make the message easy to grasp from the aisle. For example, replace a broad slogan such as “Ideas for a better future” with a direct statement about the product or service on display. Make the wording useful to your audience, not just clever to your marketing team.
Give each graphic a clear purpose. Put one key message on each surface, use large, bold type, and leave enough open space for the words to stand out. A wall crowded with product names, paragraphs, and several calls to action forces visitors to work out what matters. Choose one hero product or service, then use a supporting image or short detail to explain its value.
Check the main message from the aisle, not only from inside the stand. Visitors may pass in 3-5 seconds, so test whether the headline remains readable at a distance. Keep the logo prominent, but don’t make it carry the whole explanation. A concise tagline beneath it can tell potential visitors what the company does. Use contrast between text and background, and avoid placing important words over busy images.
Keep every brand element consistent. Match the booth’s colours, fonts, logo treatment, and images to the company’s wider identity. Apply the same choices to staff clothing, presentation slides, brochures, and digital screens. If the booth uses one colour palette but the product display uses another, visitors may struggle to connect the message with the brand. Consistency helps every surface reinforce the same idea.
Choose giveaways for your audience, not for the storage cupboard. A portable charger may suit visitors who rely on their phones during a long event; premium stationery may fit a business audience that takes notes in meetings. Add subtle branding and choose something useful. Don’t hand out an item simply because it’s easy to order. If it doesn’t support your message or appeal to the people you want to reach, it adds clutter without helping the conversation.
Use interactive elements only when they clarify your offer. A product demonstration, touchscreen, or short digital catalogue can help visitors explore a specific feature. Give each screen one clear instruction, such as “Explore the product range” or “View the project examples.” Keep the message visible when the screen is idle, so the display remains useful between interactions.
Before artwork goes to production, review every graphic as a visitor would: identify the headline, understand the offer, and find the next step. For a campaign that needs one consistent message across physical and interactive touchpoints, explore brand activation planning.
3. Listening to visitors instead of delivering an overly forceful pitch
Design the stand to encourage short, useful conversations, then qualify leads by asking about each visitor’s needs, role, and next step. Use a clear entry point, an engaging activity, and a contact-capture process that records each visitor’s interest for follow-up.
Give visitors room to approach and move through the space. Remove spare materials, oversized displays, and counters that narrow the entrance. Keep the main route clear to the product or demonstration area. An open layout helps visitors engage without feeling trapped, while staff can see when someone wants to talk or browse independently.
Make the first interaction easy. A brief demonstration, product sample, or focused activity can turn a walk-by into a 30-second conversation. Keep the activity tied to the brand identity and the visitor’s likely needs. For example, a product demonstration should show one practical feature, not force attendees through a long presentation before they can ask questions.
Train the booth team before the event. Explain the objective, assign roles, and practise opening questions that invite a response. “What are you looking to improve?” gives visitors room to explain; a rehearsed pitch can shut the exchange down. Staff should listen, ask a relevant follow-up, and share information that fits.
Prepare for busy periods as well as quiet ones. Keep the stand staffed and assign enough people to handle several visitors at once. Avoid private team conversations in visitor areas. Staff looking at their phones or talking among themselves can make the booth feel closed, even when the display is visually strong.
Use a simple lead process for every conversation. Record the visitor’s contact details, main interest, and agreed next action in a lead form or badge-scanning application. Categorise contacts by interest so the team can prioritise follow-up. If a staff member doesn’t know an answer, they can bring in a colleague or record the question for a clear response after the event.
Track more than foot traffic. Note which demonstration drew attention, which questions came up repeatedly, and where visitors stopped or left. Ask for quick feedback after an interaction, such as what information they still need. Review the notes with the team after the exhibition, then follow up with relevant leads within 48 hours. This turns visitor feedback into practical changes for the next event.
4. Setting clear and realistic exhibition goals
A booth needs a purpose before it gets a floor plan. Choose the main objective first: generating qualified leads, booking meetings, demonstrating a product, building brand awareness, or supporting recruitment. A sales-focused trade show needs a different visitor journey from a product launch. Trying to achieve everything at once can leave the team without a clear priority or a way to measure results.
Turn the chosen objective into actions the team can carry out. For lead generation, define what makes a contact relevant, what information staff should capture, and who owns follow-up. For product demonstrations, decide which feature the team will show and what visitor question it should answer. These steps connect the booth strategy to the work on the exhibition floor.
Set measures that match the objective. A lead-generation team can track qualified contacts and agreed follow-up actions. A meeting-focused team can record completed appointments and next steps. For a brand-awareness objective, note visitor questions, product interest, and useful feedback. Don’t treat total foot traffic as proof of success when the goal is to meet potential buyers or arrange sales conversations.
Make the booth elements support those measures. If the goal is product demonstrations, position the demonstration where visitors can see it and staff can speak without blocking the route. If the goal is meetings, create a quieter conversation area. Every graphic, screen, sample, and giveaway should help visitors take a useful next step. Remove anything that distracts from that purpose.
Keep graphics tied to the objective. A product launch may need a clear product name and a short explanation of its main use. A lead-generation stand can state the problem it solves and show visitors how to start a conversation. Use a headline visitors can understand quickly, then make sure staff can explain it further. Don’t leave the purpose to a polished-sounding slogan that says nothing concrete.
Brief the team before the trade show. Share the objective, target visitor, key talking points, and lead-capture method. Agree on how staff will record interest and pass contacts to the right colleague after the event. A visitor asking about implementation, for example, may need a different follow-up from someone exploring a general product introduction.
Review performance after each event. Compare the results with the original objective, then ask which activities led to useful conversations and which elements drew attention without moving visitors forward. Carry those findings into the next exhibition plan. Clear objectives make it easier to decide what to keep, adjust, or remove from future stands.
5. Avoiding bottlenecks and unused display areas
Visitors struggle to navigate when counters, screens, signs, or product displays block circulation paths. A group of staff crowding the entrance can also deter people from coming in. Keep the route open, make the main offer easy to reach, and give visitors a clear way through the stand.
Start with the floor plan. Mark the entrance, main display, and any conversation area, then trace how someone will move between them. Visitors should be able to step inside, spot the main offer, and approach it without weaving around furniture. If a screen sits across that path, move it to a side wall or angle it towards the aisle.
Use separate zones for different tasks. Place reception near an edge, product displays where visitors can approach from the aisle, and private discussions farther inside. Keep staff out of the entrance. This makes the first step into the booth feel simple, while visitors who want a longer conversation can move away from passing traffic.
Look for unused areas before adding equipment. An empty corner could suit a focused demonstration, product sample, or quiet meeting spot. Choose one purpose that supports the exhibition objective. Don’t fill the gap with extra signs or furniture just to occupy space. Each display should help visitors understand or explore the offer.
Check sightlines from several points around the stand. A tall counter can hide products behind it; a large screen can obscure a side display. Move each obstruction and check the view again. Keep signs, samples, and interactive elements within easy reach, and avoid placing popular items where visitors have to stop in the main passage.
Test the layout with the booth team before the event. Ask staff to enter carrying materials, greet an attendee, and move to the display area. Then walk the same route as a visitor. This rehearsal can reveal a tight turn, blocked conversation space, or queue that spills into the aisle. Adjust the furniture before event traffic builds.
Review visitor movement during the exhibition. Notice where people pause, which displays they bypass, and whether conversations interrupt the route. Move a portable display or reposition staff when traffic repeatedly bunches up. A successful layout makes the main offer visible without forcing visitors into a narrow path. To plan a booth around clear entry and movement, plan an open exhibition booth.
Bilievent: Exhibition booths
bilievent helps businesses turn exhibition plans into booths designed for visitor flow, clear messaging, and practical use of space. Work with the team when you’re ready to move from layout decisions to booth planning and delivery.
For exhibitions in Saudi Arabia, bilievent provides SCEGA permit support to help with event licensing and regulatory clearance. AVL production supports booth audio, visual, and lighting needs, while event management helps coordinate wider event requirements. Choose the support that fits your plans and the work involved.
Bring your exhibition objective, stand requirements, and venue information to the discussion. Contact bilievent to talk through your exhibition booth needs and next steps.
Make the next exhibition easier to execute
Use your next planning session to turn lessons from the show into clear decisions. Note what visitors asked, where conversations stalled, and which parts of the stand went unused. Then carry those observations into the next brief. This gives your team a practical starting point and helps prevent the same exhibition booth design mistakes from recurring.
When you’re ready to move from decisions to delivery, bilievent provides exhibition booths, SCEGA permit support, and AVL production. These services support different parts of exhibition preparation, from the physical stand to event requirements and on-site technical production.
Bring your event details and priorities into the conversation. Contact bilievent to discuss your booth and map out a practical next step. A clear plan gives your team a stronger base for the next exhibition, and gives visitors a better reason to stop, look, and engage.
Frequently Asked Questions
What are the most common exhibition booth design mistakes?
Common exhibition booth design mistakes include unclear messaging, cluttered displays, blocked entrances, and activities that don’t suit the audience. Another easy-to-miss problem is treating the booth as decoration rather than a working space. A polished display can still underperform if staff can’t reach product samples quickly or visitors can’t tell where to start. Review the visitor experience from the aisle to the final conversation.
How do you choose the right booth size and layout for an exhibition?
Choose a booth size and layout based on the event objective, planned activities, and space available at the venue. List what must fit, such as a product demonstration, meeting area, display, and storage, then check how visitors and staff will move around each element. A compact stand can work well for focused conversations; a larger footprint needs defined uses for the extra space. Let function guide the dimensions.
How can poor lighting, signage, or branding reduce booth visibility?
Poor lighting can hide products, while small signage and mixed brand styles make a stand harder to recognise. Check the display from 10 meters away: the logo and main offer should remain clear, and lighting should draw attention to the intended focal point. For example, a bright screen won’t help if glare makes its content unreadable. Review signs, colours, and illuminated displays together before approving the final setup.
What are the risks of late booth planning, shipping, and installation?
Late planning leaves less time to coordinate design changes, venue requirements, transport, and installation. A delayed shipment can leave key graphics or equipment unavailable during setup; inaccurate technical details can also disrupt installation. Build a schedule with clear approval points and assign someone to track each handoff. Include the exhibitor manual in the planning process so the booth design and installation arrangements reflect the venue’s actual requirements.
How can you measure exhibition booth performance and avoid common ROI mistakes?
Measure performance against the booth’s objective, not foot traffic alone. Track qualified leads, completed meetings, demonstrations, or another outcome the team agreed to pursue. Record lead sources and interests consistently, then compare follow-up results with the event record. To assess return on investment, include relevant event and booth expenses alongside attributable sales or pipeline, and distinguish leads from visitors who only collected materials.